Shopify is a well-established and popular eCommerce platform that feeds a user-friendly interface and countless outstanding features specially designed for online retailing. And adding products to Shopify is an indispensable ingredient in making a thriving, growing, engaging, and persuasive online store.
Shopify is an eCommerce platform that authorizes you to set up a store really fast without any comprehensive background of technical knowledge. In addition, integrating products into pages supports branding efforts, improves the prevailing customer experience, and creates opportunities to boost sales and engagement.
So, if you are an entrepreneur, a business person, or a newbie who does not know but wants to learn how to add products to pages on Shopify, you have come to the perfect place.
What’s more, this comprehensive guide will teach you how to add products to Shopify pages, and it shares the most valuable, informative tips you won’t find anywhere else.
Table of Contents
How To Add Products to Pages on Shopify
Among the many side business ideas prevalent in today’s technologically developing market, Shopify is considered a terrific income resource.
So, without further ado, let’s learn how to add products to pages on Shopify:
Stage 01: Product Title and Description
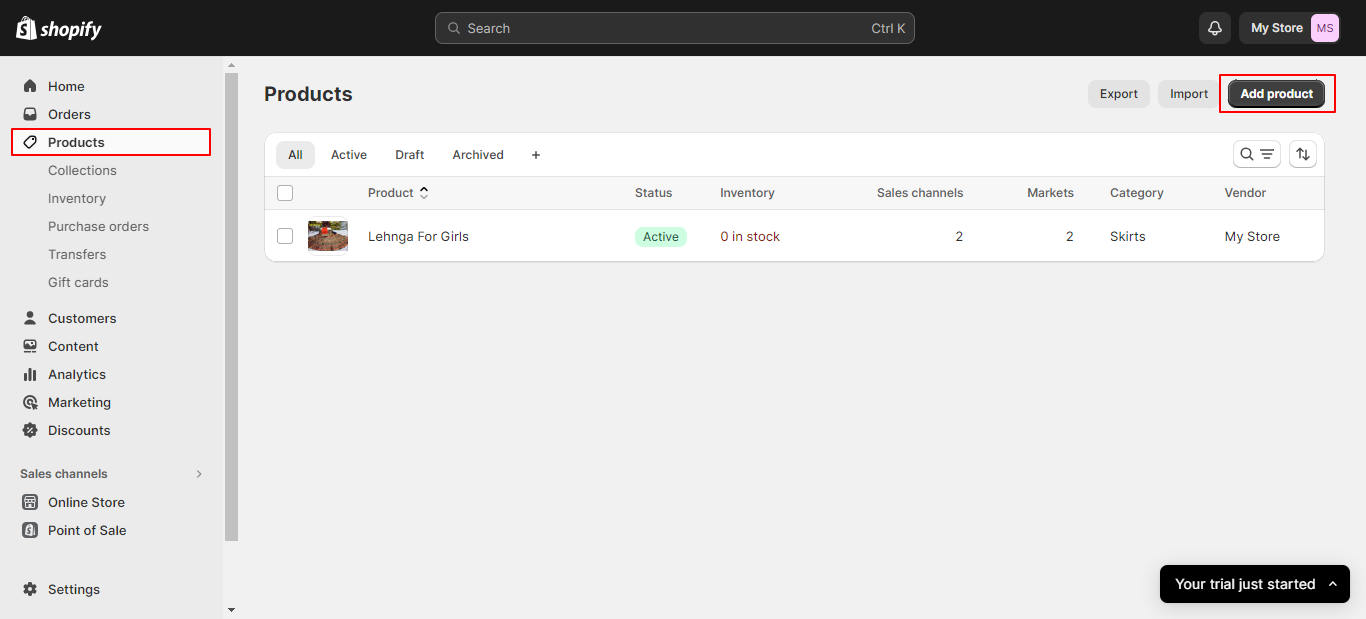
Go to your Shopify admin dashboard, find Products, then click the Add Product button (Shopify Dashboard —>Products —> Add Product). It will take you to a new window to provide the required product information.
Tips:
- Just fill the needy one and leave the rest.
- Ability to merge information as you move forward.
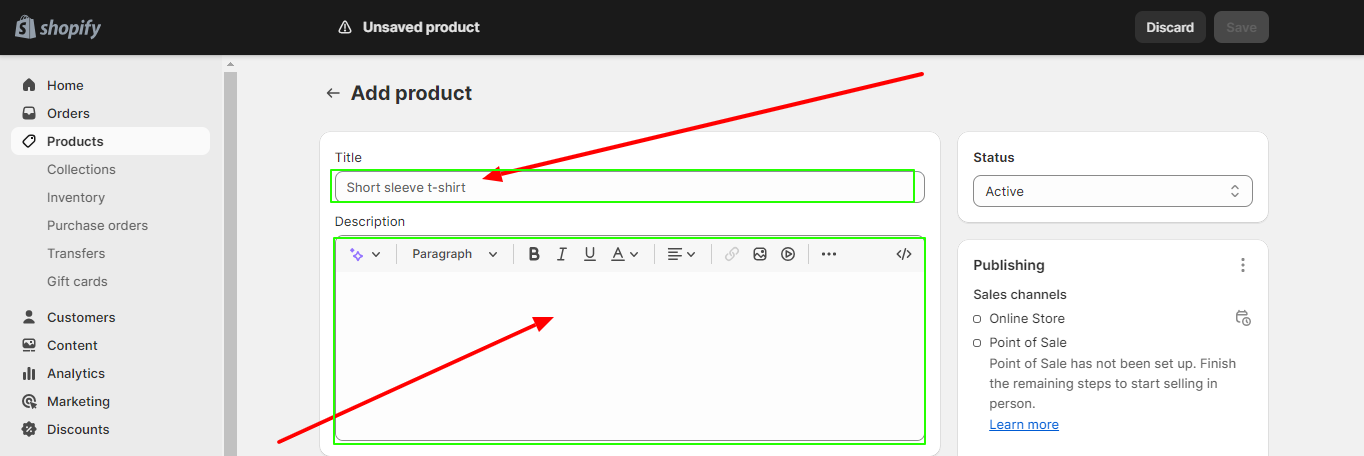
Now, provide your product name and enter a complete, detailed product description.
Tips:
- Never forget to add a keyword in your “Title” & “Product Description”.
- Always concise product title that gets straight to the point.
- Always try to evade an extended feature list.
Stage 02: Add Media
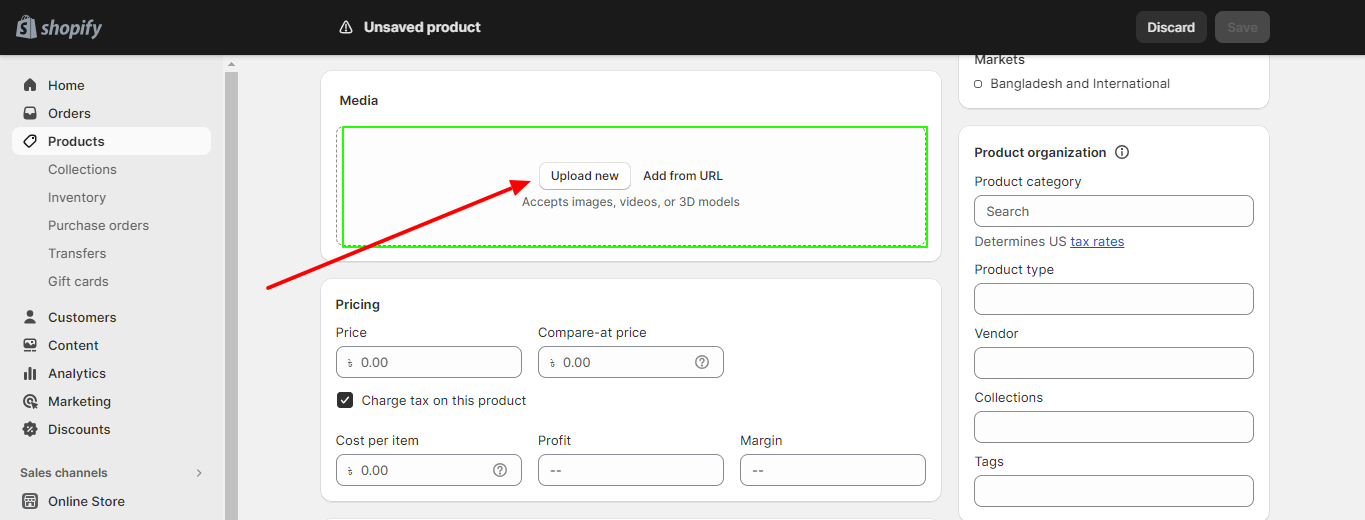
After that, press the “Add File” button to upload your product images. You can also drag and drop your files from your computer or only add them through a URL.
Tips:
- Product Images Format: The best image format granted by Shopify is PNG, you can also attach JPEG and GIF. But images must not be higher than 20 MB.
- Videos: The maximum size of a file does not exceed 01 GB, the best resolution supported is 4K and the length is 10 minutes.
- 3D Models: The best-supported format is GLB or USDZ. Shopify automatically optimizes your file when it crosses the limits but maintains the elevated quality and reduces the size.
Stage 03: Insert Value On Pricing, Inventory, Shipping, and Variants
- Price:
The next movement is to add a price to your product after you complete uploading your media.
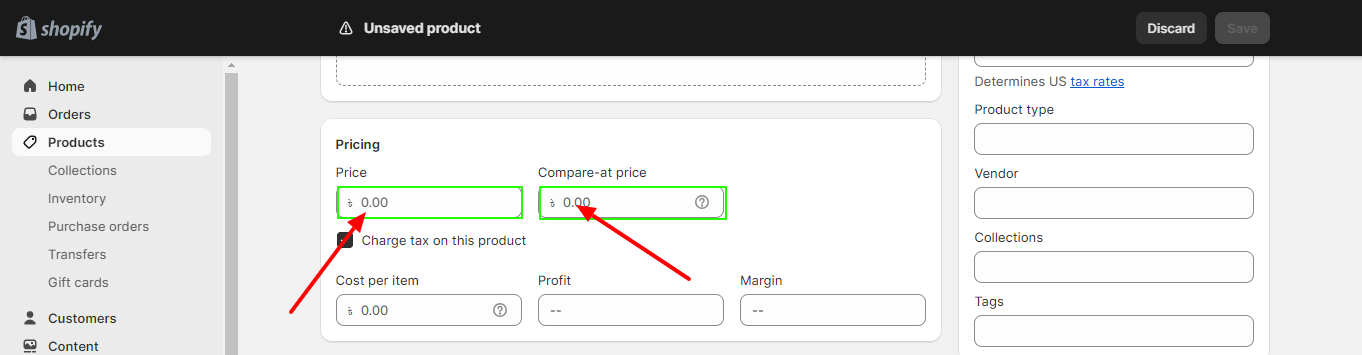
Tips:
- There you can discover a fill-in-action field called “Compare At Price”, through it, you can display the discount price if the product is on sale, or if not, you can just leave the field empty.
- If your product is taxable, press the ‘Charge tax on this product’.
- Inventory:
Right next to the price segment, you can discover the inventory segment. SKU stands for “Stock keeping unit” an exclusive value for the product. It assists you in arranging your stock and executing orders more efficiently.
Right next to the SKU option, you will see another option called Barcode. You need not to be panic about this area yet if you just started, and determined to sell online.
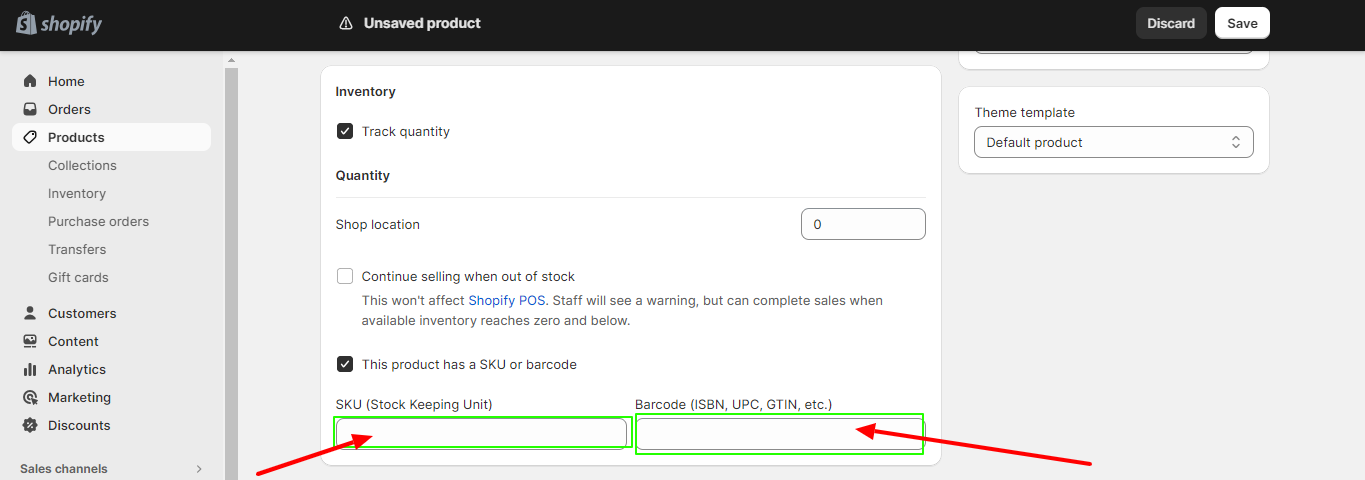
Having the “Track Quantity” option ticked means that the Shopify admin will track the quantity of this product. This ensures you are not selling any products that are out of stock.
Tips: This segment allows you to choose how you manage your inventory.
- You can choose “Inventory will be stocked at” to provide a physical address if you handle it yourself.
- Or, choose the other option, if managed inventory by a third-party app.
- Shipping:
Under the category, you can see the box “This is a physical product”, tick this box when you sell a physical product and need to deliver it.
But, if you sell any digital products or services that do not require shipping, leave this box unchecked.
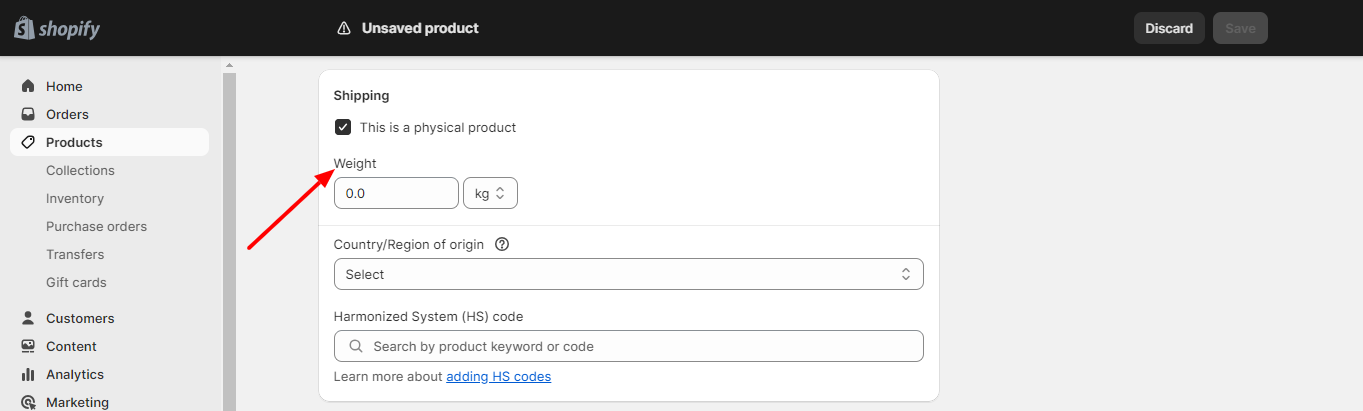
It is time to insert your product weight. For the convenience of your buyers to charge the perfect shipping amount, you must provide the authentic product weight.
On the right side of this weight field, you can locate the drop-down menu with plenty of diverse measurements, including kilograms, grams, pounds, and ounces. Select the measure that best describes the product weight.
Tips:
- You can discover two other fields, one is “Country/Territory of Origin”, which is used to ship products internationally.
- And the other is the Harmonized System (HS) code that enables customs authorities to regulate the precise tariff applicable to the product.
- Variants:
In this section, you can see the two specific fields, one is “Option Name” where you need to provide a title, like size, material, color, or style.
And the other field is “Option values” which must provide different available variants.
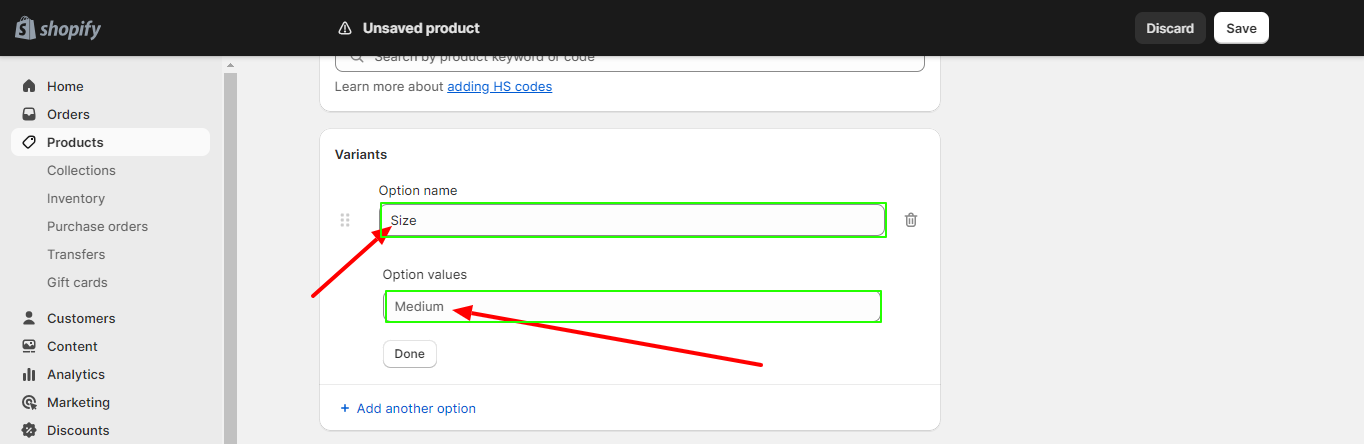
Tips:
- For better results, you must opt for furnishing its variant and price.
Stage 04: Search Engine Listing
After successfully completing the Variants section, the thing you need to take care of is search engine listing. It will help you to see the preview of your product emerge in search engine results, such as Bing and Google.
Now you can find two special fields called, page title and description, so provide the valuable info. On a quick note, it’s a duplicate version of what you wrote earlier.
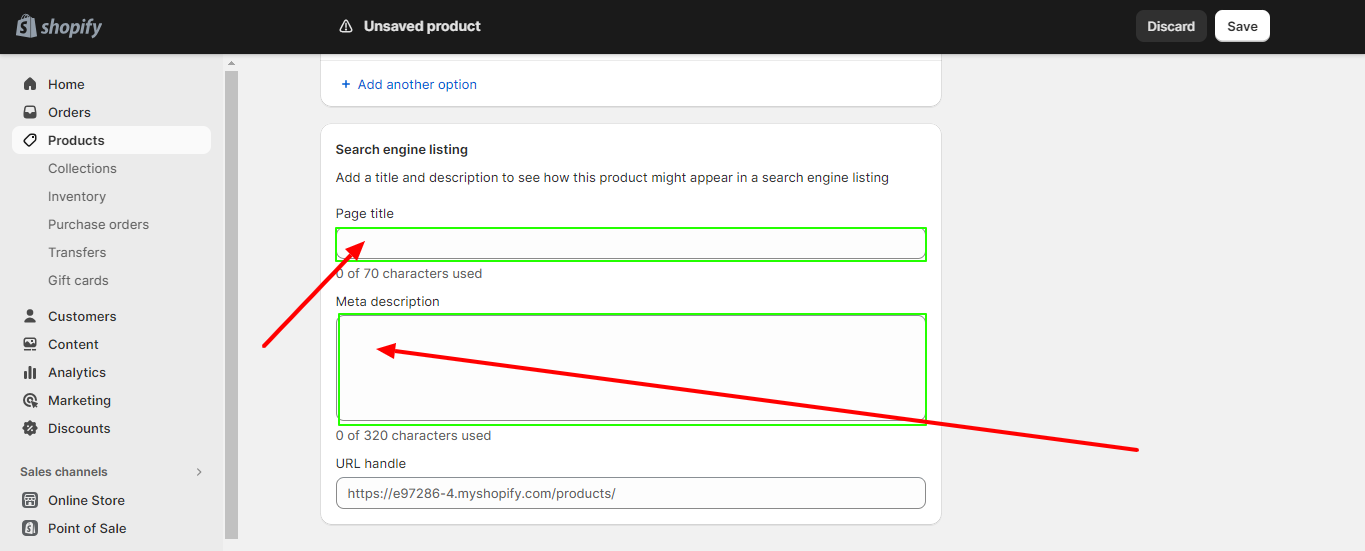
Tips:
- Product title must be under 70 characters
- Product description must be under 320 characters
Stage 05: Product Organization and Status
Now, go back to the top, and on the right side, where the “Product Status” section is located, you can see “Sales Channels and Apps”, to select the channels to sell your products.
Again, on the right side of “Product organization,” you can find four fields:
Field – 01: Type:
Type: A product can have only one product type. You can use an available product type or include a custom type.
Field – 02: Vendor:
Suppose you manufacture the product, leave the business name as the vendor, or, make it blank if you desire.
Field – 03: Collections:
Shopify groups your products into collections, making it easy for your customers to discover your products.
Field – 04: Tags:
The tag option aids in categorizing products and managing search results for your consumers.
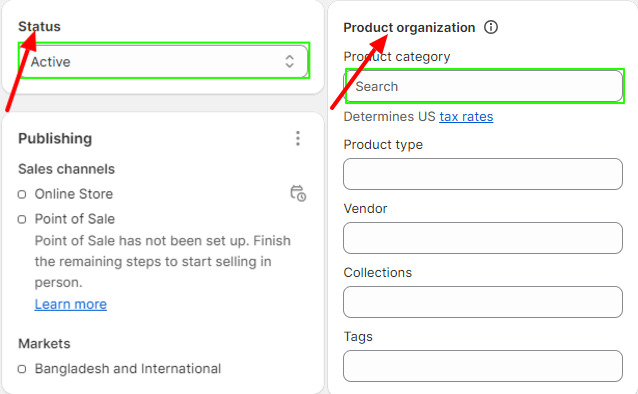
Tips:
- If your product is ready choose “Active”, if not select “Draft” to store.
And now, press the “Save” button to complete adding products to Shopify.

Congratulations, on your product in the Shopify store.
Final Thought
Now we have discussed how to add products to pages in Shopify. Suppose, you’re just initiating your desired online store or updating your existing product line. In both cases, it can all be a very influential experience.
If you want to build your store and page more alluring for visiting consumers, keep your products brand new, modern, and fresh.